Add a customer before you can invoice them. This article covers every field on the new-customer form.
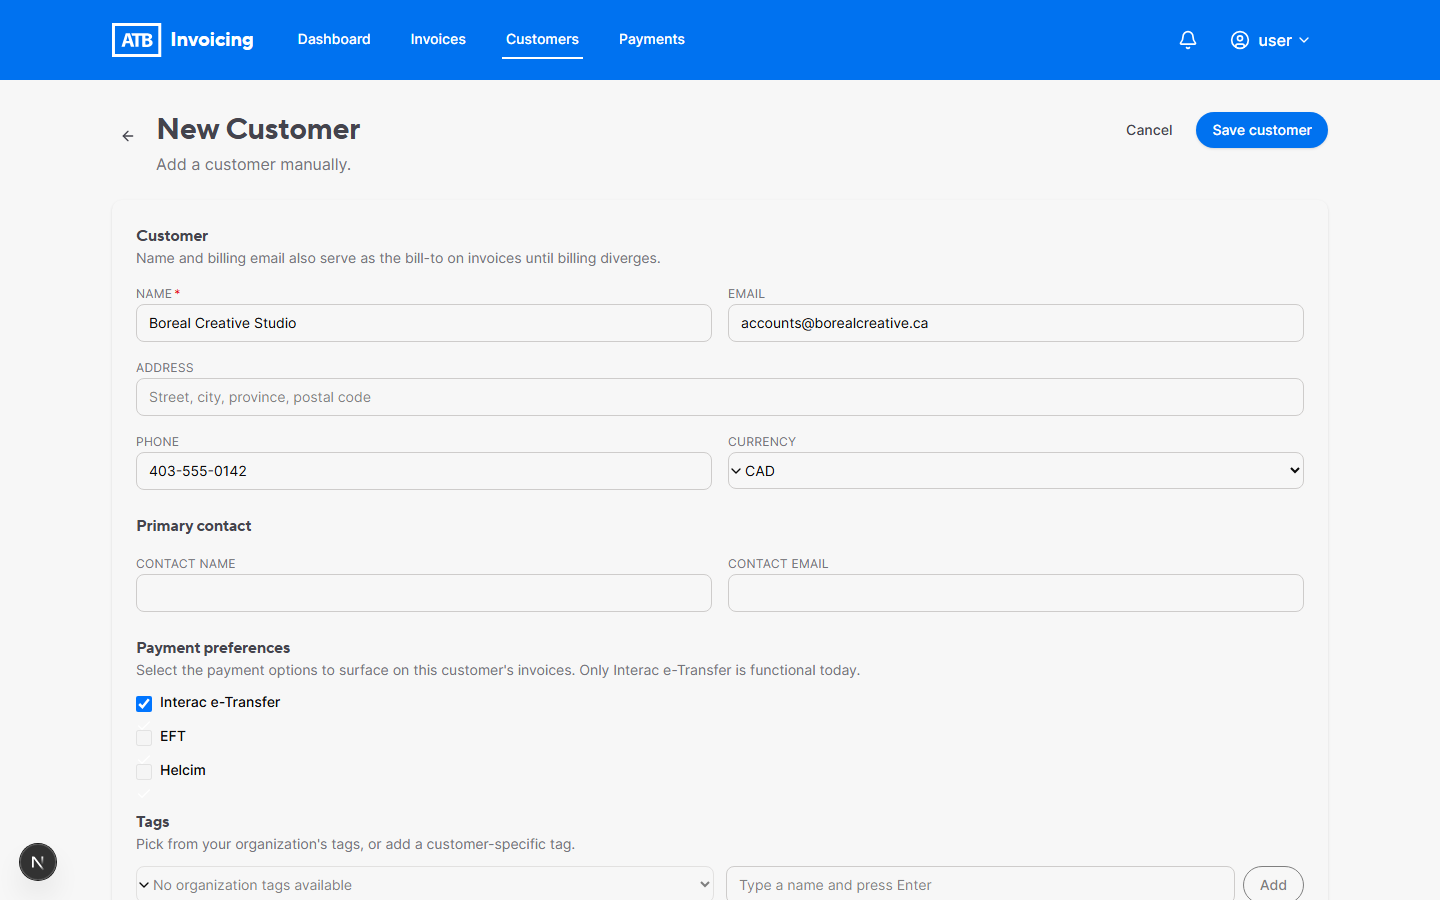
Step 1: Open the new customer form
From the sidebar, click Customers and then Add customer.
Step 2: Enter the customer's name (required)
Type the business name or individual name in the Name field. This is the only mandatory field on the form.
Step 3: Add contact details
All of these are optional, but useful:
- Email — the address where invoice emails will be delivered. Required if you want to send Interac e-Transfer requests to this customer.
- Phone — reference only. Not used to deliver invoices.
- Address — appears on the invoice.
Step 4: Choose preferred payment methods
Under Preferred payment methods, tick Interac e-Transfer if this customer will pay you by Interac.
The preferred method acts as a default when you create an invoice for this customer. You can change it per invoice.
Step 5: (Optional) Add tags
Tags are labels for grouping customers. Type a new tag and press Enter, or pick from your organization's existing tags. See Organize customers with tags for how tags work.
Step 6: Save
Click Save customer. Your customer appears in the list.
Common issues
"A customer with this email already exists."
Emails are unique within your organization. Either use a different email, or open the existing customer.